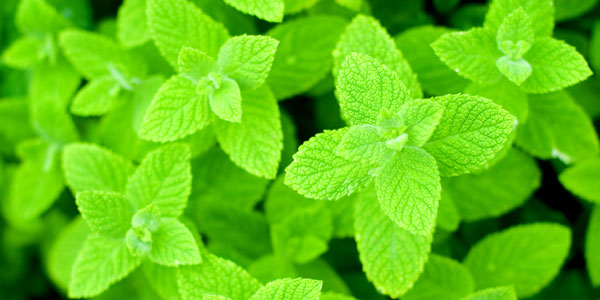
Mint is a beautiful herb that has one of the most recognizable aromas. A perennial that grows in nearly any condition, mint can be used nearly anywhere for both gardening and landscape purposes. There is a variety to fit every situation, so don’t hesitate to add this beautiful gem to your herb garden today!
Table of Contents:
Before You Plant Mint
Choose the Right Type of Mint:
- Spearmint and peppermint are the most popular types of mint. If you like chocolate, then mint chocolate may be the plant for you.
- There around 3,500 varieties of mint, so there truly is a taste for every palette.
Find a Suitable Place:
- Mint thrives in plenty of sunlight. However, it does not like dry conditions, making partial shade a necessity. An ideal location would be facing a north wall.
- While tolerant of most growing situations, optimum soil and placement will yield the best results.
- Choose a moist, well-drained location.
Prepare the Soil:
- The best soil for mint is well-dug, fertile and well-drained. Water-logged soil will yield a less beautiful plant.
- These preparations make the best growing conditions, but mint will thrive in almost any soil.
Planting/Growing Mint
What You Will Need:
- Mint seeds or plants
- Prepared soil
- Bottomless bucket
- Black plastic pierced with small holes
How to Plant Mint:
- Mint seeds can be started indoors and transplanted into the garden, or seeds can be sown directly into the soil in the spring.
- Mint has crawling roots that can overtake your garden and kill other plants. To keep this under control, begin by digging a hole large enough for the bottomless bucket (simply a bucket with the bottom cut out). Place the bottomless bucket in the hole and fill in dirt all around. It should be close enough to the surface that the roots will grow down inside, but deep enough that it cannot be seen.
- Another option for rows is to dig down approximately 1 foot and line the row with black plastic. Fill in with the removed dirt and plant the seeds according to instructions on the packet.
- Place the plants into the prepared area when planting. As the plant grows the bucket/plastic will help to contain the roots as much as possible.
- Place seedlings about 1 foot apart or thin seedlings once the seeds have sprouted.
- Water occasionally until the plant is thriving, after which you will only water during extended droughts.
- Fertilization is usually unnecessary, unless the soil is unusually poor.
- Growing mint in containers is equally as easy, and potting compost is sufficient. Water only when dry and feed once a month during the growing season.
- Containers also allow the plants to be brought indoors for the frost and cold to enjoy mint all year long!
Harvesting Mint
What You Will Need:
- Garden clippers or scissors
Steps for Care and Maintenance:
- Remove leaves as needed for harvesting. The leaves are most flavorful when the spikes are in full bloom.
- Removing leaves from the top of the plant will encourage new growth further down the stem.
- Only remove what you need, but never remove all of the leaves from the plant.
- Leaves can generally be harvested for 6 months out of the year when grown outside, or year-round when grown indoors in containers.
Additional Tips and Advice
- The main problem with mint plants is rust (orange spots often on the underside of the leaves). Be diligent in getting rid of rust quickly as this can easily kill all of your mint plants.
- Mint leaves can be dried, but it often results in a lack of flavor.
- Mint can be used to relieve upset stomachs and headaches.
Related Posts
No related posts.
mint is a very nice flavor, especially if you mix it with liqour. muddle a cup of mint leaves, a cup of refined sugar and soak it with a liter of vodka store it for a week, now you have home made after dinner drink. enjoy!
never over water mint.
try peppermint tea it is really good.